

You hear the phrase “getting it right in camera” a lot, but I don’t think people think through what that means. If you’re shooting on a digital camera, “getting it right in camera” is a misnomer nowadays. There’s lots of good resources that advise one “exposes for the right” to get the cleanest, most tonally rich images. It’s just the way our camera’s sensors work – right up to the point we blow our highlights, we’re capturing richer and richer information. Check out Martin Bailey’s excellent podcast on exposing for the right if you’d like the full story!
That’s not exactly what I’m talking about here, but I wanted to kick off this post on editing portraits with that thought, because it’s kind of important in change our mindsets with regards processing. In a world of digital sensors, getting it right in camera means shooting an image that will look overexposed unless we process it. This realisation reinforced for me the notion that photography is a process that starts and ends a good distance either side of the camera. We should shoot to get the best data, given that we should then process to get the best image.


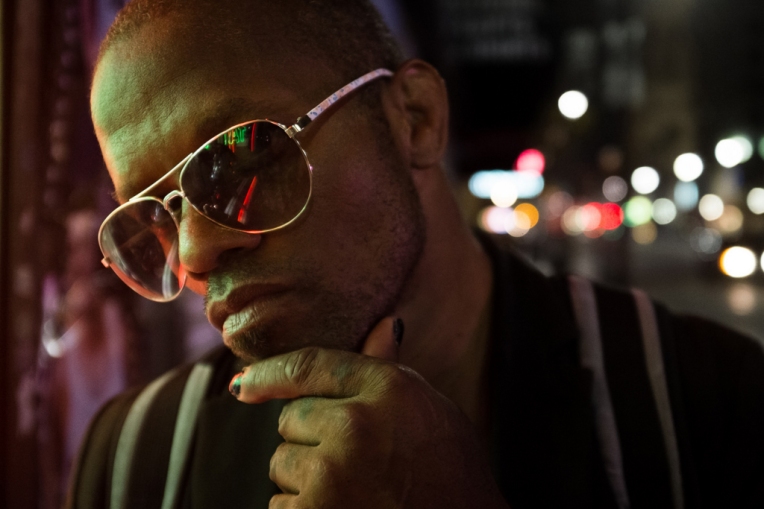
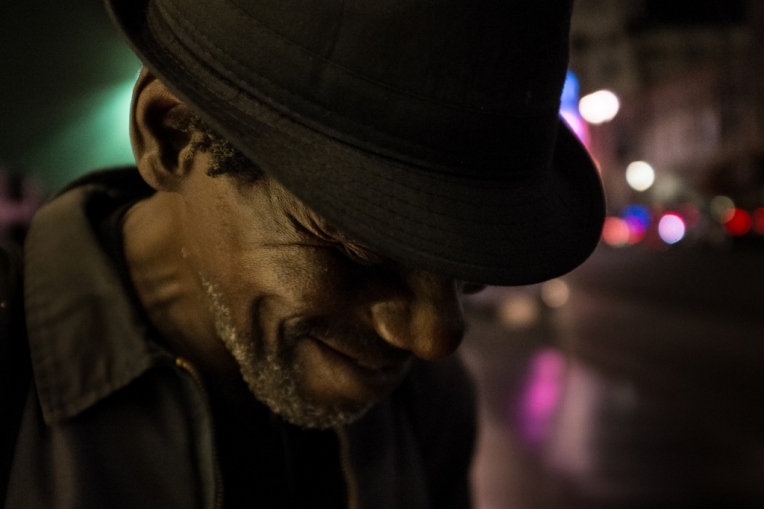
As you’ll see here with this set of before/after images from my 100 Strangers Project, whilst striving for the best data in camera I make plenty of mistakes. It’s a learning project, after all. I wanted to share here my process for editing my street portraits – partly for self reference as I look to improve, but chiefly thanks to the many questions I get through Flickr with regards the work I do.
In editing these shots then, I use two tools; first Lightroom for 80% of the work and 20% of the time, then Photoshop for 20% of the work and 80% of the time.
My Lightroom workflow starts along very similar lines;
– Boost sharpening to ~40/60, but push the masking slider up to >95.
– Boost vibrance by 10/20.
– Boost shadows by 20/40, chiefly determined by the subjects hair, which I want to keep looking natural.
– Turn the Chromatic Aberration correction on, with +1 in both fields, maybe more. My 100mm L Macro lens is lovely for portraits, but can show some green/turquoise edging at wide apertures (I shoot at f/3.2 for these portraits).
– Tweak white balance, generally I warm images very slightly, or use the pipette on the whites of the subject’s eyes to test an extreme option.
Next I grab the Lightroom brush tool for a few separate operations;
– Take a -10/25 shadow brush and burn the deeper shadows, especially around the hair and neck, and collars.
– Zap the whites of the eyes with -20/40 saturation, +4/8 shadows and +.1 exposure.
– Paint in the iris, opposite the main catchlight, using a +.6 exposure brush, sometimes with a clarity and/or saturation boost. Initially I was painting much more of the iris, but a fantastic Dani Diamond article on Fstoppers showed how light enters and leaves the eye. Working on the opposite side of the iris from the main catchlight gives lots more drama.
– Darken the upper portion of the eye very slightly; -.1 exposure. For these operations I usually find it easier to paint them in, straying over edges, then hold down Alt to clean up with much more accuracy.
– Emphasise a few key areas of brighter hair, sweeping along key lines with a +20 highlight, +20 clarity brush.
– Give clothing a little contrast boost, and maybe emphasise key highlights and shadows with a similar brush to my hair above. Glasses will generally get a clarity boost on the rims.
– Unwanted highlights, especially in glasses generally get a -10/20 highlight brush at this point.
Finally, I might add a gradient filter to add -100 clarity or -.2 exposure to one side or other, starting well out of the frame and avoiding the subject. That’s usually us finished in Lightroom. I never crop yet, as I will sometimes borrow small elements from other frames and prefer to keep things in the broad scale and composition until after that stage.


Now we’re off to Photoshop. Whilst I use Lightroom to make non-destructive, pretty consistent edits, in Photoshop I’ll immediately create some spare layers and make permanent changes.
I start work with small corrections to the subject; fiddly things I want to get out of the way first. I chiefly use the “patch” tool. I’m not sure why it doesn’t get more love! I see/hear lots of people using spot healing tools, yet I struggle to preserve skin texture with them. The patch tool is a little slower – I zoom right in to near pixel level to correct temporary skin blemishes/spots, dust spots on clothes and some (not all) stray hairs. However, for the extra time, I find a much more consistent grain and texture to the corrections, especially the skin. Occasionally, I’ll use the “fade” follow up command to blend in patched corrections, but again that’s rare as it undermines the consistent skin texture. If I’m going have to make changes to texture, I want to do them globally to a face – or you end up with blemishes replaced with excessively smooth patches which looks stranger sometimes.
When making those more global changes I have a couple of techniques. My go to method is the brush tool, using a technique from the incredible Aaron Nace at Phlearn. I’m always doing this after patching. Then I will take a large, soft edged brush at 5% opacity and paint over the face, constantly sampling and repainting with tones from the pipette. I will try to keep using shadow tones around shadow areas, etc., but will be painting heavily over and over areas. I’ll then add a layer mask and ensure the eyes and edges of the face are cleaned with a 100% black brush, then areas of contrast around the nose, eyebrows, lips, etc. are cleaned with a minimum 50% opacity black brush. I’ll pull that whole layer back to 30/50% opacity – usually at the lower end.
If I’m still not happy, I will add another layer at 50% opacity and redo all the patching a second time. If things are really desperate (only once in 89 strangers) I’ll use frequency separation. Again, the best explanation and free action for frequency separation are from Phlearn, and worth checking out here. It’s really rare I use it – as I find the patch technique, along with a little time and patience, is the most realistic approach and works for my look!
Before moving out from the face I’ll use the patch tool to clean up any red streaks in the sclera (whites of eyes), and to de-dust/scratch glasses. If there are big reflections in the glasses, I will try to patch them which usually works until the reflections hit the edges. If I’ve failed to avoid this when shooting, then I will copy the other side of the glasses, paste it, flip it horizontally and use this mirror image to provide source pixels to rebuild the affected edges. It’s slow, but strangely soothing and generally gives a good result.
Hair is edited mostly with the patch tool in tiny sections (3-5 pixels sometimes) to remove hairs that stray into eyes, or run perpendicular to the main flow. Sometimes I will using the clone stamp here, in one of the scattered brush shapes, just a few pixels across, to blend the flow of messy strands. Sometimes I will draw a few extra hairs in with the paint brush, adding them to a separate layer and adding a blur in a rainbow shape across the top so as to blend them better into my shallow DOF.


Finally I look wider than the face, tidying up any major issues in the background. I’m increasingly shooting with my lights (usually an umbrella and reflector) very close to my subject and that means they often sneak into a corner. I’ll use contact aware fill for the main area at issue, and then the patch tool to clean up the edges of the filled selection. Very occasionally I will add a little extra blur to the background, masking out my stranger, and then add a 0.5/1% noise to the same area.
There are a handful of strangers where I’ve borrowed a shoulder. eye, collar, top of head, etc. from another shot of them and composited – maybe to get the best shoulder pose with the sharp eyes or similar. I’ll handle that elsewhere. My project is 100% not a photojournalists project! I am trying to make realistic, but Vogue-style portraits. The final piece to that puzzle is some minor toning. I add a curves layer and boost blue and green in the shadows (usually 3:1 in favour of blue), and occasionally boost yellow in the highlights – but never when the background is bright. It gives a slightly more fashion tone set, to my eye.
Hopefully this set of before/after shots gives an illustration of the impact of the process. Sometimes it can be quite major, sometimes pretty invisible. In some the examples shown I’m using an adjacent frame for the “before” just to avoid losing editing data in Lightroom, but in all cases the camera settings are identical and the shots are taken milliseconds apart. I really hope they answer the questions I get on Flickr and map out my work flow and the typical actions I take to get my look. I’m not saying this is the best way, or the most efficient way, of course. I grew up in Photoshop 7.0, and am massively over manual in my use of the tool. However, I find the painstaking approach useful in getting to know an image, testing and reviewing it, before posting. Hopefully the overview is of interest and offers a few tips or ideas! Have an amazing week!


